Marp Slides


Grader Than Workspaces come with Marp installed and ready to go! In this tutorial, we'll cover the basics on how to effectively create and present slides using the Marp extension for VS Code.
Marp slides are created using Markdown. It may be helpful to review our Markdown tutorial before getting started. Markdown is a popular, simple, and lightweight markup language used to format text on the web.
What is Marp?
Marp is an open-source tool that allows you to create and present slides using Markdown. It integrates with VS Code to provide a seamless experience for writing and previewing slides. Marp is popular for its simplicity and flexibility, making it a great choice for creating presentations quickly and efficiently.
Who uses Marp?
Marp is used by a variety of professionals, including educators, developers, and speakers. Some specific examples of who uses Marp include:
-
Educators: Marp is used in many educational settings to create interactive and engaging presentations. It provides a hands-on learning experience for students with live code examples and visualizations.
-
Developers: Marp is a popular tool for developers to create technical presentations. It supports syntax highlighting and allows embedding of live code snippets.
-
Speakers: Marp is used by speakers at conferences and meetups to create and present slides. Its support for Markdown makes it easy to write and format content quickly.
How does it work?
Before we dive into creating slides, let's briefly discuss how Marp works:
-
Marp provides a Markdown-based approach to creating slides. You write your slides in a Markdown file, and Marp converts them into a slide deck.
-
To start a new Marp presentation, create a new Markdown file with the
.mdextension in your Grader Than Workspace. -
Use Marp's slide syntax to define your slides. Each slide is separated by three dashes
---. -
You can use standard Markdown syntax to format your slides, including headings, lists, images, and code blocks.
-
Marp supports advanced features like slide backgrounds, themes, and transitions to enhance your presentation.
-
You can preview your slides in real-time within VS Code by using the Marp extension's preview feature.
-
Once your slides are ready, you can export them to various formats, including PDF and HTML, for easy sharing and presenting.
Create slides
A Marp slide is a markdown document created that will automatically be formatted for you.
-
Open your Grader Than Workspace IDE
-
Open the command pallet in your Grader Than IDE by pressing the keys below at the same time:
Cmd+Shift+P
Ctrl+Shift+P
Ctrl+Shift+P
-
Now that the command pallet is open type
> Create New file...and press Enter - Select the file type
Marp Markdownand press Enter
This will open a new markdown editor that looks like the image below:


Create a Title Slide
Using the same file we created earlier add the following content for a title slide:
---
marp: true
title: Intro to Programming
author: Charles Xavier
date: June 25, 2024
theme: default
---
# Intro to Programming 🧑💻
**By Professor X**
*June 25, 2024*

The top section of the Marp slide surrounded by --- is known as the front matter. It contains directives that
configure the presentation's settings and metadata. These directives enable features like setting the title, author, and
theme, as well as enabling additional functionalities such as pagination and custom styles. Below are some features you
can configure:
| Directive | Description | Example |
|---|---|---|
marp: true |
Enables Marp rendering for the Markdown file. | marp: true |
title |
Sets the title of the presentation. | title: Intro to Programming |
author |
Sets the author of the presentation. | author: Charles Xavier |
date |
Sets the date of the presentation. | date: June 25, 2024 |
theme |
Sets the theme for the slides. More themes | theme: default |
paginate |
Enables pagination (slide numbers). | paginate: true |
footer |
Sets a footer text for all slides. | footer: Confidential |
backgroundImage |
Sets a background image for the slides. | backgroundImage: url('background.png') |
style |
Adds custom CSS styles to the slides. | style: 'section { color: red; }' |
Preview Slides
To view the slides press the Preview
button in the upper right corner of the open markdown editor.


Create a Slide
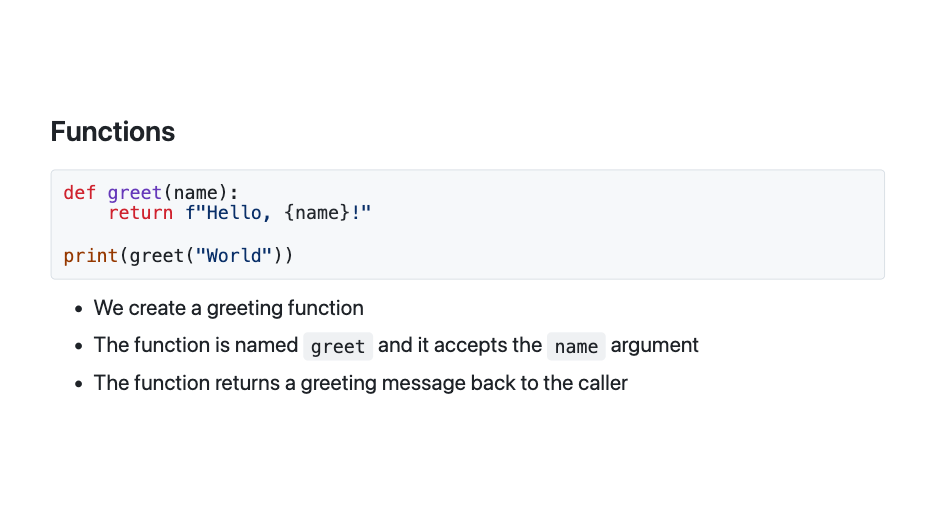
In the same Markdown file, add a --- (3 dash) separator after the title slide, then add the following content. The separator tells Marp to create a new slide, and the following content will be on its own slide.
---

## Functions

```python
def greet(name):
    return f"Hello, {name}!"

print(greet("World"))
```

- We create a greeting function
- The function is named `greet` and it accepts the `name` argument
- The function returns a greeting message back to the caller

<!--
My class notes:

`def` - defines the function

`greet` - is the name of the function

`(name)` - is where the parameters of the function are placed. Don't forget scope!

`return` - sends a value back to the caller of the function
-->
As you can see, normal Markdown is accepted in the slides.
The content within <!-- ... --> are notes that will be visible only to you when presenting.
