Create
The Grader Workspace is a powerful tool that allows instructors and students to work on assignments, code, and projects in a collaborative environment. To get started with the Grader Workspace, there are several ways to create workspaces that can be customized to your needs.
Create a Workspace
In this tutorial, we will create a Workspace. A Workspace may be used for your personal use or it may be used as a blueprint to create your student's Workspaces in your course.
Your institution will need a Grader Than Workspace license.
Before you can work with Grader Than Workspaces, your institution will need a Grader Than Workspace license agreement. If you'd like trail access, please contact us.
1) Start by clicking the Workspaces ![]()
![]() button in the activity bar, on the left side of the screen. This will open the Workspace Explorer page.
button in the activity bar, on the left side of the screen. This will open the Workspace Explorer page.
2) Now that the Workspace Explorer page is open, select the workspace image you'd like to work with. If you don't see this click the Explore tab at the top of the screen.
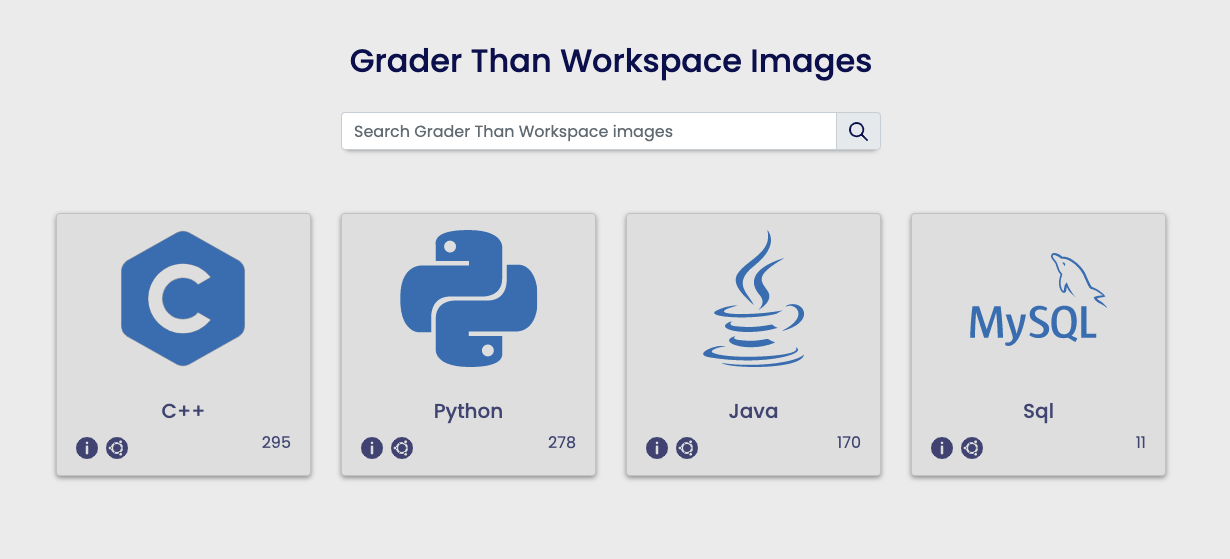
If you don't see a page similar to the image depicted above, click the tab Explore at the top of the screen
3) Click the icon of the workspace you'd like to create. This will open the Workspace creation modal.
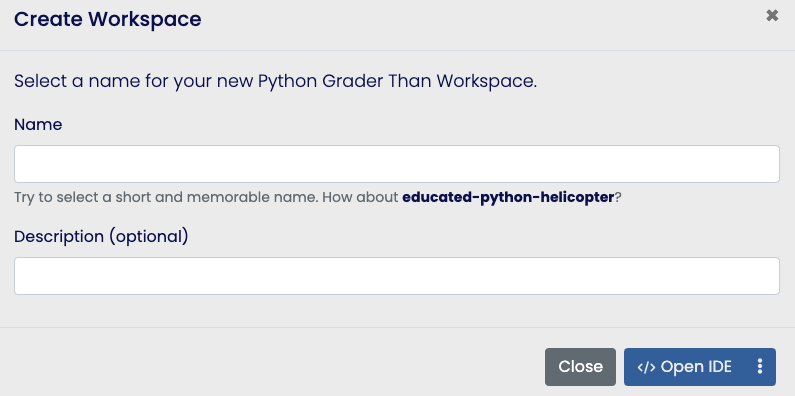
4) Type in a unique name for your workspace in the Name field and then click the blue ![]()
![]() Open IDE
button in the bottom right corner.
Open IDE
button in the bottom right corner.
 You've created a new workspace! A new tab will automatically appear in your browser which will take you to your
workspace.
You've created a new workspace! A new tab will automatically appear in your browser which will take you to your
workspace.
To open the desktop
Select the More Options ![]()
![]() button on the right side of the blue button in the bottom right corner of the Workspace creation modal and then
select the
button on the right side of the blue button in the bottom right corner of the Workspace creation modal and then
select the ![]()
![]() Open
Desktop option in the menu that appears.
Open
Desktop option in the menu that appears.
Disable your pop-up blockers or else you may not see the new workspace tab in your browser.
Assign a Workspace to your course
A Grader Than Workspace Configurations (1) may be linked to your courses, the configuration will act as a blueprint for your student's workspaces. This will enable you to effectively standardize the workspace environments in your course.
- A Grader Than Workspace Configuration is a collection of specifications and parameters that define the hardware and software requirements of a workspace. It is used to ensure the workspace is properly configured upon each startup.
New workspace
In this walk through we will learn how to create a new workspace and attach it to your course. It's assumed you already have a course created.
You need to create a course before beginning this tutorial.
Let's begin:
- Open your course's Workspace Settings Page, open the Courses page by clicking the Courses

 button in the activity bar, on the left side of the screen.
 - On the Courses page, click the blue Open button that corresponds to the course you'd like to open.
-
Now that the Courses page is open, in the bar at the top of the screen, click the tab labeled Workspace.
-
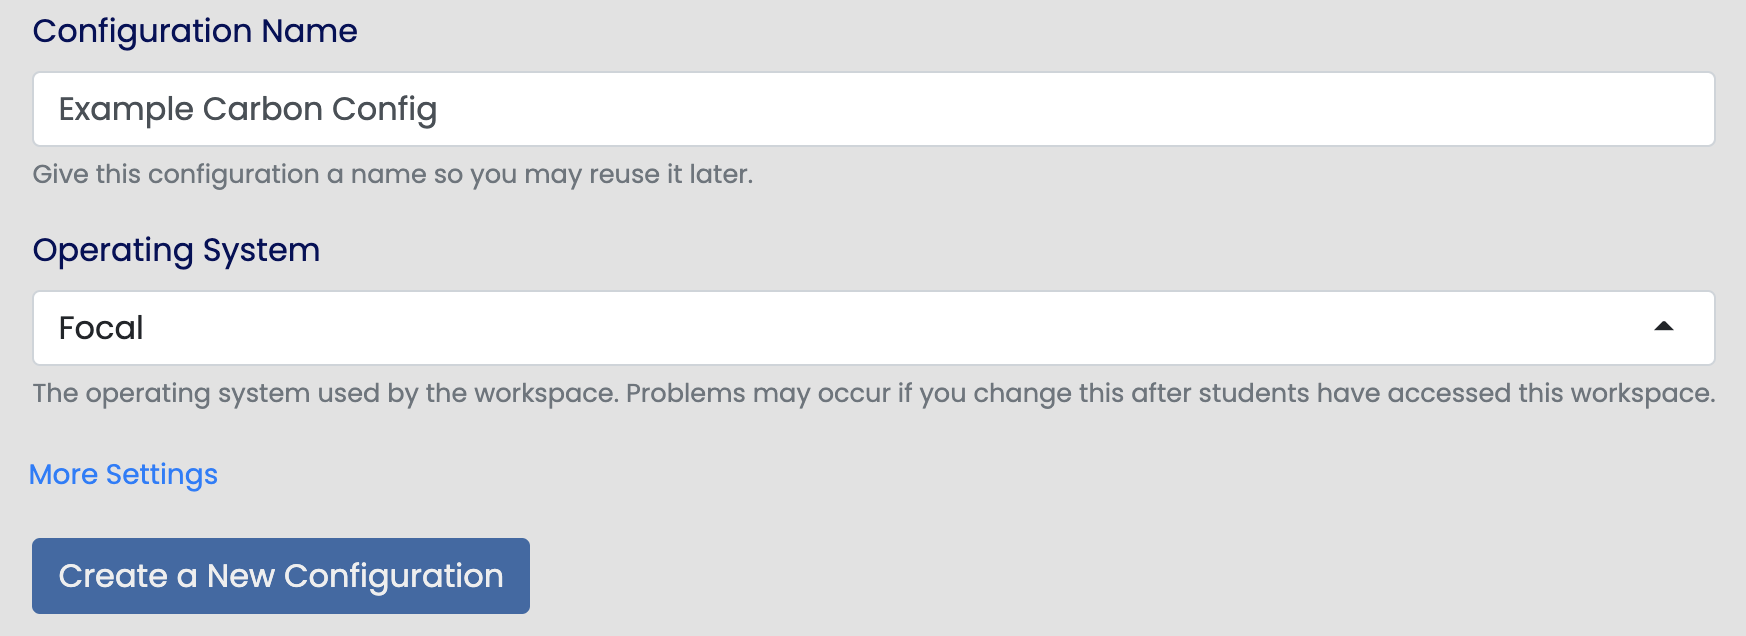
In the Workspace view, you will see a form used to create a new Grader Than Workspace.
-
Use the field labeled Configuration Name to give your Workspace a name, so that you can use it again for another course.
-
Select from one of our pre-configured operating system images in the Operating System menu. Our programming based OS images comes with everything you need to start coding out-of-the-box (depending on your school's license, you may have different OS options)
-
Click the blue button labeled Create a new Configuration. Now you're done!
Existing workspace
In this walk through we will learn how to attach an existing Workspace to your course. It's assumed you already have a course and Workspace created.
1) Start by clicking the Workspaces ![]()
![]() button in the activity bar, on the left side of the screen. This will open the Workspaces page.
button in the activity bar, on the left side of the screen. This will open the Workspaces page.
2) In the list of your existing Workspaces, find the Workspace you'd like to connect to your course.
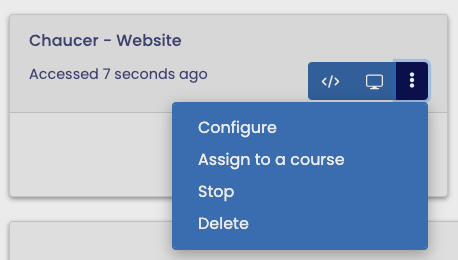
3) Once you have found your workspace, click the More Options
![]()
![]() button which will open a menu.
button which will open a menu.
4) In the menu options menu that appears select the Assign to a course option.
5) A modal will appear in the middle of the screen. Select the course you'd like to assign the workspace to.
Open your Workspace
1) To view your course's workspace, open the Courses page by clicking the Courses ![]()
![]() button in the activity bar, on the left side of the screen.
button in the activity bar, on the left side of the screen.
2) On the Courses page, click the blue Open button that corresponds to the course you'd like to open.
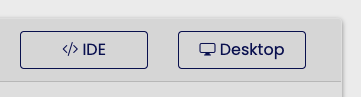
3) Now that the Courses page is open, in the upper right corner of the main window you will see the buttons displayed below.
The Workspace buttons aren't there
If you do not see the workspace buttons, it may mean one of the following situations:
1) You have not assigned a Workspace Configuration for the course. Learn how to create a Workspace Configuration for more information.
2) Your institution has not invested in Grader Than Workspace licenses. If you'd like access to a trial, please contact us.
-

 IDE - This
opens the Grader Than IDE, this is a complete browser IDE built off of VS Code. You will most likely be working in the
Grader Than IDE.
IDE - This
opens the Grader Than IDE, this is a complete browser IDE built off of VS Code. You will most likely be working in the
Grader Than IDE. -

 Desktop - This opens the desktop view of the Grader Than Workspace. From here, you will be able to work with the
workspace, much like your local computer.
Desktop - This opens the desktop view of the Grader Than Workspace. From here, you will be able to work with the
workspace, much like your local computer.
Once you've selected an option, you may need to wait 30-40 seconds for the Workspace to start up, and then you are ready to go! Dive deeper into your Workspace configuration here
More Settings
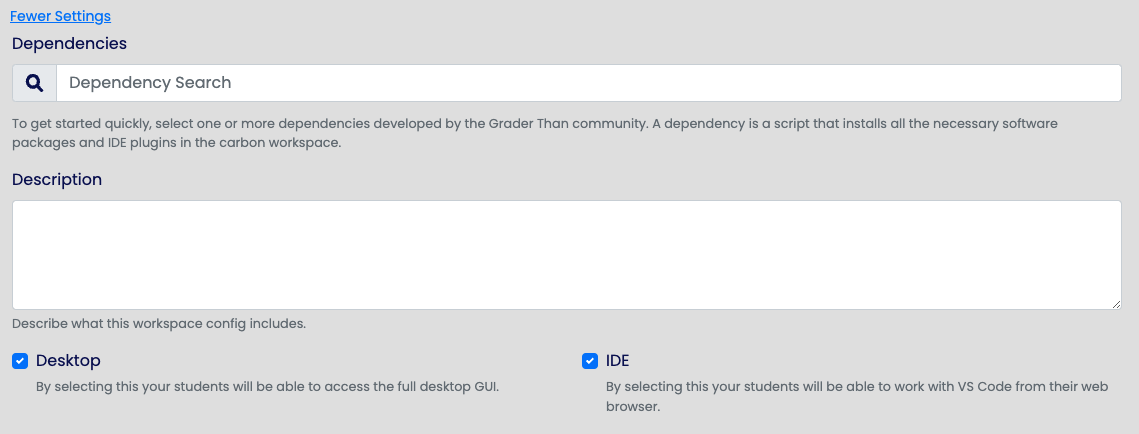
By clicking on the button labeled More Settings in the configuration creation menu (found above the blue creation button), you will reveal additional configuration settings you can access.
-
Dependencies - These are shell scripts used to install or start software your Workspace depends upon.
-
Description - Give your Workspace a description so that your colleagues may understand its purpose.
-
Desktop/IDE - Uncheck these boxes if you'd like to disable access to either of these features.